2025 年 1 月 1 日、適当にググって出てきた University of the People へ入学することにした。自分の中で条件を満たしたのがこの大学だった。UoPeople については、いろいろな記事がすでにあるためここでは割愛する。一応触れておくと、入学の動機は、2025 年 1 月から一時的に仕事がほぼなくなることが確定し、枯れそうだったから。
RuntimeError: Expected all tensors to be on the same device, but found at least two devices, cuda:0 and cpu! (when checking argument for argument tensors in method wrapper_CUDA_cat)
import torch
from transformers import AutoTokenizer, AutoModelForCausalLM, BitsAndBytesConfig
import time
import datetime
# メモリ使用状態を取得する
torch.cuda.memory._record_memory_history()
# 処理開始
start = time.perf_counter()
# rinnaモデルをローカルパス指定
tokenizer = AutoTokenizer.from_pretrained("./bilingual-gpt-neox-4b", use_fast=False)
model = AutoModelForCausalLM.from_pretrained("./bilingual-gpt-neox-4b", torch_dtype=torch.float16, device_map='auto')
text = "絶叫マシンは、"
token_ids = tokenizer.encode(text, add_special_tokens=False, return_tensors="pt")
with torch.no_grad():
output_ids = model.generate(
token_ids.to(model.device),
max_new_tokens=100,
min_new_tokens=100,
do_sample=True,
temperature=1.0,
top_p=0.95,
pad_token_id=tokenizer.pad_token_id,
bos_token_id=tokenizer.bos_token_id,
eos_token_id=tokenizer.eos_token_id
)
output = tokenizer.decode(output_ids.tolist()[0])
print(output)
# 計測終了
end = time.perf_counter()
print(end - start)
# device_map出力print(model.hf_device_map)
# 現在時刻取得
t_delta = datetime.timedelta(hours=9)
JST = datetime.timezone(t_delta, 'JST')
now = datetime.datetime.now(JST)
d = now.strftime('%Y%m%d%H%M%S')
# メモリのスナップショットを取得
torch.cuda.memory._dump_snapshot("./snapshot/float16_auto_" + d + ".pickle")
実行結果 1 回目
float16_auto_20240915221145
You are using the default legacy behaviour of the <class 'transformers.models.t5.tokenization_t5.T5Tokenizer'>. This is expected, and simply means that the `legacy` (previous) behavior will be used so nothing changes for you. If you want to use the new behaviour, set `legacy=False`. This should only be set if you understand what it means, and thoroughly read the reason why this was added as explained in https://github.com/huggingface/transformers/pull/24565
Some parameters are on the meta device because they were offloaded to the cpu.
絶叫マシンは、
(これは、ちょっとネタバレしてますが)
『 ジェットコースターで、
ある瞬間に、ジェットコースターが止まって、
落下する。』
そして、そこを、乗り合わせた客たちが、目撃することになる。
その、落下する、ジェットコースターが、
どれも、同じ型の、
『 真っ黒な、黒いモノ 』
(その落下は、落下のスピードが
かなり遅いので、落ちるモノも、
落下が終わると
29.240153521001048
{'gpt_neox.embed_in': 0, 'gpt_neox.emb_dropout': 0, 'gpt_neox.layers.0': 0, 'gpt_neox.layers.1': 0, 'gpt_neox.layers.2': 0, 'gpt_neox.layers.3': 0, 'gpt_neox.layers.4': 0, 'gpt_neox.layers.5': 0, 'gpt_neox.layers.6': 0, 'gpt_neox.layers.7': 0, 'gpt_neox.layers.8': 0, 'gpt_neox.layers.9': 0, 'gpt_neox.layers.10': 0, 'gpt_neox.layers.11': 0, 'gpt_neox.layers.12': 0, 'gpt_neox.layers.13': 0, 'gpt_neox.layers.14': 0, 'gpt_neox.layers.15': 0, 'gpt_neox.layers.16': 0, 'gpt_neox.layers.17': 0, 'gpt_neox.layers.18': 0, 'gpt_neox.layers.19': 0, 'gpt_neox.layers.20': 0, 'gpt_neox.layers.21': 0, 'gpt_neox.layers.22': 0, 'gpt_neox.layers.23': 0, 'gpt_neox.layers.24': 0, 'gpt_neox.layers.25': 0, 'gpt_neox.layers.26': 0, 'gpt_neox.layers.27': 0, 'gpt_neox.layers.28': 0, 'gpt_neox.layers.29': 0, 'gpt_neox.layers.30': 0, 'gpt_neox.layers.31': 'cpu', 'gpt_neox.layers.32': 'cpu', 'gpt_neox.layers.33': 'cpu', 'gpt_neox.layers.34': 'cpu', 'gpt_neox.layers.35': 'cpu', 'gpt_neox.final_layer_norm': 'cpu', 'embed_out': 'cpu'}
以下は、device_map の中身を抽出したもの。"gpt_neox.layers.30" までは GPU、"gpt_neox.layers.31" からは CPU に割り当てられている。
You are using the default legacy behaviour of the <class 'transformers.models.t5.tokenization_t5.T5Tokenizer'>. This is expected, and simply means that the `legacy` (previous) behavior will be used so nothing changes for you. If you want to use the new behaviour, set `legacy=False`. This should only be set if you understand what it means, and thoroughly read the reason why this was added as explained in https://github.com/huggingface/transformers/pull/24565
Some parameters are on the meta device because they were offloaded to the cpu.
絶叫マシンは、 1 日の旅行でした。 は、少し遅い 1 日で、私達 (3 時間 ) のピックアップ :13:30 、 3 時間観光。 私たちは 1 日してくれました :30:30 、 1 時間観光。 私は、ツアーに 13:30 、 3 時間に申し訳ありませんが、 1 つは、トラック、 4
29.20200488300179
{'gpt_neox.embed_in': 0, 'gpt_neox.emb_dropout': 0, 'gpt_neox.layers.0': 0, 'gpt_neox.layers.1': 0, 'gpt_neox.layers.2': 0, 'gpt_neox.layers.3': 0, 'gpt_neox.layers.4': 0, 'gpt_neox.layers.5': 0, 'gpt_neox.layers.6': 0, 'gpt_neox.layers.7': 0, 'gpt_neox.layers.8': 0, 'gpt_neox.layers.9': 0, 'gpt_neox.layers.10': 0, 'gpt_neox.layers.11': 0, 'gpt_neox.layers.12': 0, 'gpt_neox.layers.13': 0, 'gpt_neox.layers.14': 0, 'gpt_neox.layers.15': 0, 'gpt_neox.layers.16': 0, 'gpt_neox.layers.17': 0, 'gpt_neox.layers.18': 0, 'gpt_neox.layers.19': 0, 'gpt_neox.layers.20': 0, 'gpt_neox.layers.21': 0, 'gpt_neox.layers.22': 0, 'gpt_neox.layers.23': 0, 'gpt_neox.layers.24': 0, 'gpt_neox.layers.25': 0, 'gpt_neox.layers.26': 0, 'gpt_neox.layers.27': 0, 'gpt_neox.layers.28': 0, 'gpt_neox.layers.29': 0, 'gpt_neox.layers.30': 0, 'gpt_neox.layers.31': 'cpu', 'gpt_neox.layers.32': 'cpu', 'gpt_neox.layers.33': 'cpu', 'gpt_neox.layers.34': 'cpu', 'gpt_neox.layers.35': 'cpu', 'gpt_neox.final_layer_norm': 'cpu', 'embed_out': 'cpu'}
実行結果 3 回目
float16_auto_20240915221654
You are using the default legacy behaviour of the <class 'transformers.models.t5.tokenization_t5.T5Tokenizer'>. This is expected, and simply means that the `legacy` (previous) behavior will be used so nothing changes for you. If you want to use the new behaviour, set `legacy=False`. This should only be set if you understand what it means, and thoroughly read the reason why this was added as explained in https://github.com/huggingface/transformers/pull/24565
Some parameters are on the meta device because they were offloaded to the cpu.
絶叫マシンは、40フィート以下のものをさしていました。そして、それらのものは、そのように、より長く維持される必要がありました。
1974年に、私は、ウォーターワークスのプロジェクトで、40フィートのフライング・ボートを運転しているとき、この技術的な問題について、多くの質問を受けました。その答えは、「安全」でした。しかし、その安全は、その技術が必要とされる限り、1974年、1975年、そして、197
28.929758404003223
{'gpt_neox.embed_in': 0, 'gpt_neox.emb_dropout': 0, 'gpt_neox.layers.0': 0, 'gpt_neox.layers.1': 0, 'gpt_neox.layers.2': 0, 'gpt_neox.layers.3': 0, 'gpt_neox.layers.4': 0, 'gpt_neox.layers.5': 0, 'gpt_neox.layers.6': 0, 'gpt_neox.layers.7': 0, 'gpt_neox.layers.8': 0, 'gpt_neox.layers.9': 0, 'gpt_neox.layers.10': 0, 'gpt_neox.layers.11': 0, 'gpt_neox.layers.12': 0, 'gpt_neox.layers.13': 0, 'gpt_neox.layers.14': 0, 'gpt_neox.layers.15': 0, 'gpt_neox.layers.16': 0, 'gpt_neox.layers.17': 0, 'gpt_neox.layers.18': 0, 'gpt_neox.layers.19': 0, 'gpt_neox.layers.20': 0, 'gpt_neox.layers.21': 0, 'gpt_neox.layers.22': 0, 'gpt_neox.layers.23': 0, 'gpt_neox.layers.24': 0, 'gpt_neox.layers.25': 0, 'gpt_neox.layers.26': 0, 'gpt_neox.layers.27': 0, 'gpt_neox.layers.28': 0, 'gpt_neox.layers.29': 0, 'gpt_neox.layers.30': 0, 'gpt_neox.layers.31': 'cpu', 'gpt_neox.layers.32': 'cpu', 'gpt_neox.layers.33': 'cpu', 'gpt_neox.layers.34': 'cpu', 'gpt_neox.layers.35': 'cpu', 'gpt_neox.final_layer_norm': 'cpu', 'embed_out': 'cpu'}
実行結果 4 回目
float16_auto_2024091522183
You are using the default legacy behaviour of the <class 'transformers.models.t5.tokenization_t5.T5Tokenizer'>. This is expected, and simply means that the `legacy` (previous) behavior will be used so nothing changes for you. If you want to use the new behaviour, set `legacy=False`. This should only be set if you understand what it means, and thoroughly read the reason why this was added as explained in https://github.com/huggingface/transformers/pull/24565
Some parameters are on the meta device because they were offloaded to the cpu.
絶叫マシンは、これくらいしかないと断言できる。いや、ないわけではないが、このタイプのものは他にない。これは「ジェットコースター」を「お化け屋敷」に置き換えてもいい。お化け屋敷の場合、「これはお化け屋敷。お化けに怯えてもらわないと、お客さまに安心して入ってもらえない。怖いと気持ちいいは別物なのだ」というメッセージを出さないと、客は怖いもの見たさで入らない。しかし、ジェットコースターの場合は、怖がってもらわなければならないが、
28.104383083998982
{'gpt_neox.embed_in': 0, 'gpt_neox.emb_dropout': 0, 'gpt_neox.layers.0': 0, 'gpt_neox.layers.1': 0, 'gpt_neox.layers.2': 0, 'gpt_neox.layers.3': 0, 'gpt_neox.layers.4': 0, 'gpt_neox.layers.5': 0, 'gpt_neox.layers.6': 0, 'gpt_neox.layers.7': 0, 'gpt_neox.layers.8': 0, 'gpt_neox.layers.9': 0, 'gpt_neox.layers.10': 0, 'gpt_neox.layers.11': 0, 'gpt_neox.layers.12': 0, 'gpt_neox.layers.13': 0, 'gpt_neox.layers.14': 0, 'gpt_neox.layers.15': 0, 'gpt_neox.layers.16': 0, 'gpt_neox.layers.17': 0, 'gpt_neox.layers.18': 0, 'gpt_neox.layers.19': 0, 'gpt_neox.layers.20': 0, 'gpt_neox.layers.21': 0, 'gpt_neox.layers.22': 0, 'gpt_neox.layers.23': 0, 'gpt_neox.layers.24': 0, 'gpt_neox.layers.25': 0, 'gpt_neox.layers.26': 0, 'gpt_neox.layers.27': 0, 'gpt_neox.layers.28': 0, 'gpt_neox.layers.29': 0, 'gpt_neox.layers.30': 0, 'gpt_neox.layers.31': 'cpu', 'gpt_neox.layers.32': 'cpu', 'gpt_neox.layers.33': 'cpu', 'gpt_neox.layers.34': 'cpu', 'gpt_neox.layers.35': 'cpu', 'gpt_neox.final_layer_norm': 'cpu', 'embed_out': 'cpu'}
You are using the default legacy behaviour of the <class 'transformers.models.t5.tokenization_t5.T5Tokenizer'>. This is expected, and simply means that the `legacy` (previous) behavior will be used so nothing changes for you. If you want to use the new behaviour, set `legacy=False`. This should only be set if you understand what it means, and thoroughly read the reason why this was added as explained in https://github.com/huggingface/transformers/pull/24565
絶叫マシンは、どれも、お値段が高いという印象があったので、
今回、体験してみて、とてもお得に感じました。
お食事も美味しくいただけました。 投稿日時:2015年6月4日 記事No.49873 投稿者:おーちゃん 投稿日:2015年6月4日 投稿者:なこ 【接客】 団体客が数組とカウンターの席には、中国人
26.849325699000474
{'': 0}
Killed
スナップショットを取得するところで Out of Memory が発生した。2 回目以降も同様の結果となった。
実行結果 2 回目
You are using the default legacy behaviour of the <class 'transformers.models.t5.tokenization_t5.T5Tokenizer'>. This is expected, and simply means that the `legacy` (previous) behavior will be used so nothing changes for you. If you want to use the new behaviour, set `legacy=False`. This should only be set if you understand what it means, and thoroughly read the reason why this was added as explained in https://github.com/huggingface/transformers/pull/24565
絶叫マシンは、ちょっとお高めでしたけど、ちょっとした楽しみにはなりそう。
お土産を買うなら、ぜひ「あられのふくちゃん」のあられをおすすめします。
あと、あられ工場に「おめでとうございます、あられ100万粒無料プレゼント!」と書いてあって「あ、あれ?これって、100万個買わされたっていう意味?」と思いましたが、どうやらそれらしい。(笑)
あられ
27.01915191900116
{'': 0}
Killed
実行結果 3 回目
You are using the default legacy behaviour of the <class 'transformers.models.t5.tokenization_t5.T5Tokenizer'>. This is expected, and simply means that the `legacy` (previous) behavior will be used so nothing changes for you. If you want to use the new behaviour, set `legacy=False`. This should only be set if you understand what it means, and thoroughly read the reason why this was added as explained in https://github.com/huggingface/transformers/pull/24565
絶叫マシンは、2018年4月に開業した新観光スポットで、観覧車や観覧車で地上27メートルの高さから琵琶湖を望むことができます。びわ湖大津館では、期間限定で、夜のライトアップされた館内を観覧車を回るナイトショーが開催されています。
びわ湖大津プリンスホテル
【滋賀】大津プリンスホテルでバイキングを楽しみたい 家族旅行にもおすすめ
JR大津駅より徒歩5分の滋賀県大津市にあるホテル。JR大津駅のすぐ近くにあります。
宿泊だけでなく、ランチも充実しており、1,
26.62877797499823
{'': 0}
Killed
実行結果 4 回目
You are using the default legacy behaviour of the <class 'transformers.models.t5.tokenization_t5.T5Tokenizer'>. This is expected, and simply means that the `legacy` (previous) behavior will be used so nothing changes for you. If you want to use the new behaviour, set `legacy=False`. This should only be set if you understand what it means, and thoroughly read the reason why this was added as explained in https://github.com/huggingface/transformers/pull/24565
絶叫マシンは、かなり高額のようですが。 私には関係ありません、はい。 では、みなさま、今宵のアデュー。 おやっさん [...] [続きを読む]
お久しぶりですね。お久しぶりすぎて、もう誰も来てないんじゃないかって心配しておりましたが、 どうにかこうにか、まだお元気でお過ごしのようで、何よりです。 さてさて、今回のお題は どうでもいいが
24.92448170100033
{'': 0}
Killed
You are using the default legacy behaviour of the <class 'transformers.models.t5.tokenization_t5.T5Tokenizer'>. This is expected, and simply means that the `legacy` (previous) behavior will be used so nothing changes for you. If you want to use the new behaviour, set `legacy=False`. This should only be set if you understand what it means, and thoroughly read the reason why this was added as explained in https://github.com/huggingface/transformers/pull/24565
絶叫マシンは、やはり楽しい物なんでしょうね。
「遊園地」の関連語
遊園地で絶叫マシンに乗って楽しまないと、遊園地に来た意味がありませんね
「遊園地」の関連サイト情報
「遊園地」おすすめ記事一覧
「遊園地」お役立ちリンク
絶叫マシンが待ち時間を潰す!
絶叫マシンが待ち時間を潰す!
絶叫マシンが待ち時間を潰す! 絶叫マシン待ちは遊園地でお土産物選びに時間を潰すのが一番!
絶叫マシン待ちは
11.630876867999177
{'': 0}
実行結果 2 回目
You are using the default legacy behaviour of the <class 'transformers.models.t5.tokenization_t5.T5Tokenizer'>. This is expected, and simply means that the `legacy` (previous) behavior will be used so nothing changes for you. If you want to use the new behaviour, set `legacy=False`. This should only be set if you understand what it means, and thoroughly read the reason why this was added as explained in https://github.com/huggingface/transformers/pull/24565
絶叫マシンは、2018年12月25日まで『ド・ドドンコ』として1日に2公演開催。
(「雪」は「雪月」に改称、同年12月16日 - 25日「超・ド・ド・ド・ド・ド・ド 雪・雪・雪・雪 ド・ド・ド・ド・ド・ド・ド・ド・ド・ド・ド・ド・ド・ド
12.504706722000265
{'': 0}
実行結果 3 回目
You are using the default legacy behaviour of the <class 'transformers.models.t5.tokenization_t5.T5Tokenizer'>. This is expected, and simply means that the `legacy` (previous) behavior will be used so nothing changes for you. If you want to use the new behaviour, set `legacy=False`. This should only be set if you understand what it means, and thoroughly read the reason why this was added as explained in https://github.com/huggingface/transformers/pull/24565
絶叫マシンは、大がかったですが、子供も大喜びで乗れて、いい思い出になりました。
天気にも恵まれ、素晴らしい眺望でした。係の方に大変お世話になりました。
食事もおいしく、バイキングでしたが、種類が豊富でした。
子供の遊ぶところもあり、子供が満足していました。
大満足です。また行きたいです。
とても綺麗でお子様も喜んで頂けたようで大変嬉しく思います。
大浴場にベビー用の
12.663078620000306
{'': 0}
実行結果 4 回目
You are using the default legacy behaviour of the <class 'transformers.models.t5.tokenization_t5.T5Tokenizer'>. This is expected, and simply means that the `legacy` (previous) behavior will be used so nothing changes for you. If you want to use the new behaviour, set `legacy=False`. This should only be set if you understand what it means, and thoroughly read the reason why this was added as explained in https://github.com/huggingface/transformers/pull/24565
絶叫マシンは、超・面白かった!
大興奮で、超・感動でした!!
あと、これまた、超・感動の、
「スピルバーグ・マジック」!
この映画、何と、
「ディズニー映画のリメイク版」だったのです!
この映画の、ミッキー・マウスは、
ディズニーの、初代ミッキーで、
この、ディズニー・キャラクターが、
超・超・超・超超超可愛いい!
映画の中の、ディズニー・キャラクターが、超・超・
12.312457019001158
{'': 0}
import torch
from transformers import AutoTokenizer, AutoModelForCausalLM, BitsAndBytesConfig
import time
import datetime
# メモリ使用状態を取得する
torch.cuda.memory._record_memory_history()
# 処理開始
start = time.perf_counter()
# rinnaモデルをローカルパス指定
tokenizer = AutoTokenizer.from_pretrained("./bilingual-gpt-neox-4b", use_fast=False)
model = AutoModelForCausalLM.from_pretrained("./bilingual-gpt-neox-4b", device_map='auto')
text = "絶叫マシンは、"
token_ids = tokenizer.encode(text, add_special_tokens=False, return_tensors="pt")
with torch.no_grad():
output_ids = model.generate(
token_ids.to(model.device),
max_new_tokens=100,
min_new_tokens=100,
do_sample=True,
temperature=1.0,
top_p=0.95,
pad_token_id=tokenizer.pad_token_id,
bos_token_id=tokenizer.bos_token_id,
eos_token_id=tokenizer.eos_token_id
)
output = tokenizer.decode(output_ids.tolist()[0])
print(output)
# 計測終了
end = time.perf_counter()
print(end - start)
# device_map出力print(model.hf_device_map)
# 現在時刻取得
t_delta = datetime.timedelta(hours=9)
JST = datetime.timezone(t_delta, 'JST')
now = datetime.datetime.now(JST)
d = now.strftime('%Y%m%d%H%M%S')
# メモリのスナップショットを取得
torch.cuda.memory._dump_snapshot("./snapshot/auto_" + d + ".pickle")
実行結果 1 回目
You are using the default legacy behaviour of the <class 'transformers.models.t5.tokenization_t5.T5Tokenizer'>. This is expected, and simply means that the `legacy` (previous) behavior will be used so nothing changes for you. If you want to use the new behaviour, set `legacy=False`. This should only be set if you understand what it means, and thoroughly read the reason why this was added as explained in https://github.com/huggingface/transformers/pull/24565
Some parameters are on the meta device because they were offloaded to the disk and cpu.
絶叫マシンは、まだ、ほとんどないに等しい状況です。
その上、お尻から出る怪光線は、本当に気味が悪いと思います。
私も、乗ってみたいけど、恐いような気がします。
この、大魔神、実は、お酒が大好きな「お酒を飲むおじさん」なんですが
そんなおじさんのことが、好きなんですね。
このおじさんが、悪者を倒すと「正義」なんです。
私は、子供の頃から「正義」と「悪」って、
261.3050184269996
{'gpt_neox.embed_in': 0, 'gpt_neox.emb_dropout': 0, 'gpt_neox.layers.0': 0, 'gpt_neox.layers.1': 0, 'gpt_neox.layers.2': 0, 'gpt_neox.layers.3': 0, 'gpt_neox.layers.4': 0, 'gpt_neox.layers.5': 0, 'gpt_neox.layers.6': 0, 'gpt_neox.layers.7': 0, 'gpt_neox.layers.8': 0, 'gpt_neox.layers.9': 0, 'gpt_neox.layers.10': 0, 'gpt_neox.layers.11': 0, 'gpt_neox.layers.12': 0, 'gpt_neox.layers.13': 'cpu', 'gpt_neox.layers.14': 'cpu', 'gpt_neox.layers.15': 'cpu', 'gpt_neox.layers.16': 'cpu', 'gpt_neox.layers.17': 'cpu', 'gpt_neox.layers.18': 'cpu', 'gpt_neox.layers.19': 'cpu', 'gpt_neox.layers.20': 'cpu', 'gpt_neox.layers.21': 'cpu', 'gpt_neox.layers.22': 'cpu', 'gpt_neox.layers.23': 'cpu', 'gpt_neox.layers.24': 'cpu', 'gpt_neox.layers.25': 'cpu', 'gpt_neox.layers.26': 'cpu', 'gpt_neox.layers.27': 'disk', 'gpt_neox.layers.28': 'disk', 'gpt_neox.layers.29': 'disk', 'gpt_neox.layers.30': 'disk', 'gpt_neox.layers.31': 'disk', 'gpt_neox.layers.32': 'disk', 'gpt_neox.layers.33': 'disk', 'gpt_neox.layers.34': 'disk', 'gpt_neox.layers.35': 'disk', 'gpt_neox.final_layer_norm': 'disk', 'embed_out': 'disk'}
Killed
You are using the default legacy behaviour of the <class 'transformers.models.t5.tokenization_t5.T5Tokenizer'>. This is expected, and simply means that the `legacy` (previous) behavior will be used so nothing changes for you. If you want to use the new behaviour, set `legacy=False`. This should only be set if you understand what it means, and thoroughly read the reason why this was added as explained in https://github.com/huggingface/transformers/pull/24565
Some parameters are on the meta device because they were offloaded to the cpu and disk.
絶叫マシンは、何台あるのでしょうか? もう、何台も乗ったなあ。 何台乗りましたか? 1台だけ、2台乗って、1台で帰って、1台だけ、 乗って帰ったって言うのがありましたよねえ。 いや、でも、まあ、乗った台数。 じゃあ、あと、どのくらい乗ったんですか? (笑) 今、あのぉ、111台かな? あれ、
246.77167507500053
{'gpt_neox.embed_in': 0, 'gpt_neox.emb_dropout': 0, 'gpt_neox.layers.0': 0, 'gpt_neox.layers.1': 0, 'gpt_neox.layers.2': 0, 'gpt_neox.layers.3': 0, 'gpt_neox.layers.4': 0, 'gpt_neox.layers.5': 0, 'gpt_neox.layers.6': 0, 'gpt_neox.layers.7': 0, 'gpt_neox.layers.8': 0, 'gpt_neox.layers.9': 0, 'gpt_neox.layers.10': 0, 'gpt_neox.layers.11': 0, 'gpt_neox.layers.12': 0, 'gpt_neox.layers.13': 'cpu', 'gpt_neox.layers.14': 'cpu', 'gpt_neox.layers.15': 'cpu', 'gpt_neox.layers.16': 'cpu', 'gpt_neox.layers.17': 'cpu', 'gpt_neox.layers.18': 'cpu', 'gpt_neox.layers.19': 'cpu', 'gpt_neox.layers.20': 'cpu', 'gpt_neox.layers.21': 'cpu', 'gpt_neox.layers.22': 'cpu', 'gpt_neox.layers.23': 'cpu', 'gpt_neox.layers.24': 'cpu', 'gpt_neox.layers.25': 'cpu', 'gpt_neox.layers.26': 'cpu', 'gpt_neox.layers.27': 'disk', 'gpt_neox.layers.28': 'disk', 'gpt_neox.layers.29': 'disk', 'gpt_neox.layers.30': 'disk', 'gpt_neox.layers.31': 'disk', 'gpt_neox.layers.32': 'disk', 'gpt_neox.layers.33': 'disk', 'gpt_neox.layers.34': 'disk', 'gpt_neox.layers.35': 'disk', 'gpt_neox.final_layer_norm': 'disk', 'embed_out': 'disk'}
Killed
You are using the default legacy behaviour of the <class 'transformers.models.t5.tokenization_t5.T5Tokenizer'>. This is expected, and simply means that the `legacy` (previous) behavior will be used so nothing changes for you. If you want to use the new behaviour, set `legacy=False`. This should only be set if you understand what it means, and thoroughly read the reason why this was added as explained in https://github.com/huggingface/transformers/pull/24565
Could not find the bitsandbytes CUDA binary at PosixPath('/home/panco/anaconda3/envs/rinna-py311/lib/python3.11/site-packages/bitsandbytes/libbitsandbytes_cuda124.so')
The installed version of bitsandbytes was compiled without GPU support. 8-bit optimizers, 8-bit multiplication, and GPU quantization are unavailable.
Traceback (most recent call last):
  File "/home/panco/workspace/rinna_test.py", line 19, in <module>
    model = AutoModelForCausalLM.from_pretrained("./bilingual-gpt-neox-4b", quantization_config=quantization_config, device_map='auto')
            ^^^^^^^^^^^^^^^^^^^^^^^^^^^^^^^^^^^^^^^^^^^^^^^^^^^^^^^^^^^^^^^^^^^^^^^^^^^^^^^^^^^^^^^^^^^^^^^^^^^^^^^^^^^^^^^^^^^^^^^^^^^
  File "/home/panco/anaconda3/envs/rinna-py311/lib/python3.11/site-packages/transformers/models/auto/auto_factory.py", line 563, in from_pretrained
    return model_class.from_pretrained(
           ^^^^^^^^^^^^^^^^^^^^^^^^^^^^
  File "/home/panco/anaconda3/envs/rinna-py311/lib/python3.11/site-packages/transformers/modeling_utils.py", line 3754, in from_pretrained
    ) = cls._load_pretrained_model(
        ^^^^^^^^^^^^^^^^^^^^^^^^^^^
  File "/home/panco/anaconda3/envs/rinna-py311/lib/python3.11/site-packages/transformers/modeling_utils.py", line 4214, in _load_pretrained_model
    new_error_msgs, offload_index, state_dict_index = _load_state_dict_into_meta_model(
                                                      ^^^^^^^^^^^^^^^^^^^^^^^^^^^^^^^^^
  File "/home/panco/anaconda3/envs/rinna-py311/lib/python3.11/site-packages/transformers/modeling_utils.py", line 889, in _load_state_dict_into_meta_model
    hf_quantizer.create_quantized_param(model, param, param_name, param_device, state_dict, unexpected_keys)
  File "/home/panco/anaconda3/envs/rinna-py311/lib/python3.11/site-packages/transformers/quantizers/quantizer_bnb_8bit.py", line 206, in create_quantized_param
    new_value = bnb.nn.Int8Params(new_value, requires_grad=False, **kwargs).to(target_device)
                ^^^^^^^^^^^^^^^^^^^^^^^^^^^^^^^^^^^^^^^^^^^^^^^^^^^^^^^^^^^^^^^^^^^^^^^^^^^^^
  File "/home/panco/anaconda3/envs/rinna-py311/lib/python3.11/site-packages/bitsandbytes/nn/modules.py", line 626, in to
    return self.cuda(device)
           ^^^^^^^^^^^^^^^^^
  File "/home/panco/anaconda3/envs/rinna-py311/lib/python3.11/site-packages/bitsandbytes/nn/modules.py", line 587, in cuda
    CB, CBt, SCB, SCBt, coo_tensorB = bnb.functional.double_quant(B)
                                      ^^^^^^^^^^^^^^^^^^^^^^^^^^^^^^
  File "/home/panco/anaconda3/envs/rinna-py311/lib/python3.11/site-packages/bitsandbytes/functional.py", line 2523, in double_quant
    row_stats, col_stats, nnz_row_ptr = get_colrow_absmax(A, threshold=threshold)
                                        ^^^^^^^^^^^^^^^^^^^^^^^^^^^^^^^^^^^^^^^^^
  File "/home/panco/anaconda3/envs/rinna-py311/lib/python3.11/site-packages/bitsandbytes/functional.py", line 2422, in get_colrow_absmax
    lib.cget_col_row_stats(ptrA, ptrRowStats, ptrColStats, ptrNnzrows, ct.c_float(threshold), rows, cols)
    ^^^^^^^^^^^^^^^^^^^^^^
  File "/home/panco/anaconda3/envs/rinna-py311/lib/python3.11/site-packages/bitsandbytes/cextension.py", line 73, in __getattr__
    return getattr(self._lib, item)
           ^^^^^^^^^^^^^^^^^^^^^^^^
  File "/home/panco/anaconda3/envs/rinna-py311/lib/python3.11/ctypes/__init__.py", line 389, in __getattr__
    func = self.__getitem__(name)
           ^^^^^^^^^^^^^^^^^^^^^^
  File "/home/panco/anaconda3/envs/rinna-py311/lib/python3.11/ctypes/__init__.py", line 394, in __getitem__
    func = self._FuncPtr((name_or_ordinal, self))
           ^^^^^^^^^^^^^^^^^^^^^^^^^^^^^^^^^^^^^^
AttributeError: /home/panco/anaconda3/envs/rinna-py311/lib/python3.11/site-packages/bitsandbytes/libbitsandbytes_cpu.so: undefined symbol: cget_col_row_stats
Could not find the bitsandbytes CUDA binary at PosixPath('/home/panco/anaconda3/envs/rinna-py311/lib/python3.11/site-packages/bitsandbytes/libbitsandbytes_cuda124.so')
The installed version of bitsandbytes was compiled without GPU support. 8-bit optimizers, 8-bit multiplication, and GPU quantization are unavailable.
++++++++++++++++++++++++++++++++++++++++++++++++++++++++++++
++++++++++++++++++ BUG REPORT INFORMATION ++++++++++++++++++
++++++++++++++++++++++++++++++++++++++++++++++++++++++++++++
++++++++++++++++++++++++++ OTHER +++++++++++++++++++++++++++
CUDA specs: CUDASpecs(highest_compute_capability=(8, 9), cuda_version_string='124', cuda_version_tuple=(12, 4))
PyTorch settings found: CUDA_VERSION=124, Highest Compute Capability: (8, 9).
Library not found: /home/panco/anaconda3/envs/rinna-py311/lib/python3.11/site-packages/bitsandbytes/libbitsandbytes_cuda124.so. Maybe you need to compile it from source?
If you compiled from source, try again with `make CUDA_VERSION=DETECTED_CUDA_VERSION`,
for example, `make CUDA_VERSION=113`.

The CUDA version for the compile might depend on your conda install, if using conda.
Inspect CUDA version via `conda list | grep cuda`.
To manually override the PyTorch CUDA version please see: https://github.com/TimDettmers/bitsandbytes/blob/main/docs/source/nonpytorchcuda.mdx
The directory listed in your path is found to be non-existent: VSCODE_WSL_EXT_LOCATION/up
Found duplicate CUDA runtime files (see below).

We select the PyTorch default CUDA runtime, which is 12.4,
but this might mismatch with the CUDA version that is needed for bitsandbytes.
To override this behavior set the `BNB_CUDA_VERSION=<version string, e.g. 122>` environmental variable.

For example, if you want to use the CUDA version 122,
    BNB_CUDA_VERSION=122 python ...

OR set the environmental variable in your .bashrc:
    export BNB_CUDA_VERSION=122

In the case of a manual override, make sure you set LD_LIBRARY_PATH, e.g.
export LD_LIBRARY_PATH=$LD_LIBRARY_PATH:/usr/local/cuda-11.2,
* Found CUDA runtime at: /usr/local/cuda/lib64/libcudart.so
* Found CUDA runtime at: /usr/local/cuda/lib64/libcudart.so.12
* Found CUDA runtime at: /usr/local/cuda/lib64/libcudart.so.12.6.68
* Found CUDA runtime at: /usr/local/cuda/lib64/libcudart.so
* Found CUDA runtime at: /usr/local/cuda/lib64/libcudart.so.12
* Found CUDA runtime at: /usr/local/cuda/lib64/libcudart.so.12.6.68
++++++++++++++++++++++++++++++++++++++++++++++++++++++++++++
++++++++++++++++++++++ DEBUG INFO END ++++++++++++++++++++++
++++++++++++++++++++++++++++++++++++++++++++++++++++++++++++
Checking that the library is importable and CUDA is callable...
Traceback (most recent call last):
  File "/home/panco/anaconda3/envs/rinna-py311/lib/python3.11/site-packages/bitsandbytes/diagnostics/main.py", line 66, in main
    sanity_check()
  File "/home/panco/anaconda3/envs/rinna-py311/lib/python3.11/site-packages/bitsandbytes/diagnostics/main.py", line 40, in sanity_check
    adam.step()
  File "/home/panco/anaconda3/envs/rinna-py311/lib/python3.11/site-packages/torch/optim/optimizer.py", line 484, in wrapper
    out = func(*args, **kwargs)
          ^^^^^^^^^^^^^^^^^^^^^
  File "/home/panco/anaconda3/envs/rinna-py311/lib/python3.11/site-packages/torch/utils/_contextlib.py", line 116, in decorate_context
    return func(*args, **kwargs)
           ^^^^^^^^^^^^^^^^^^^^^
  File "/home/panco/anaconda3/envs/rinna-py311/lib/python3.11/site-packages/bitsandbytes/optim/optimizer.py", line 287, in step
    self.update_step(group, p, gindex, pindex)
  File "/home/panco/anaconda3/envs/rinna-py311/lib/python3.11/site-packages/torch/utils/_contextlib.py", line 116, in decorate_context
    return func(*args, **kwargs)
           ^^^^^^^^^^^^^^^^^^^^^
  File "/home/panco/anaconda3/envs/rinna-py311/lib/python3.11/site-packages/bitsandbytes/optim/optimizer.py", line 500, in update_step
    F.optimizer_update_32bit(
  File "/home/panco/anaconda3/envs/rinna-py311/lib/python3.11/site-packages/bitsandbytes/functional.py", line 1588, in optimizer_update_32bit
    optim_func = str2optimizer32bit[optimizer_name][0]
                 ^^^^^^^^^^^^^^^^^^
NameError: name 'str2optimizer32bit' is not defined
Above we output some debug information.
Please provide this info when creating an issue via https://github.com/TimDettmers/bitsandbytes/issues/new/choose
WARNING: Please be sure to sanitize sensitive info from the output before posting it.
You are using the default legacy behaviour of the <class 'transformers.models.t5.tokenization_t5.T5Tokenizer'>. This is expected, and simply means that the `legacy` (previous) behavior will be used so nothing changes for you. If you want to use the new behaviour, set `legacy=False`. This should only be set if you understand what it means, and thoroughly read the reason why this was added as explained in https://github.com/huggingface/transformers/pull/24565
絶叫マシンは、
「ジェットコースターは無理」
といった意見もあがるほど。
その分、1日中満喫出来ます。
アトラクションの所要時間は40分前後なので、
休憩しながらのんびり過ごすことも出来ますよ。
このコースター系ではジェットコースターがおすすめ。
最高速度は77kmもある本格的なものです。
ジェットコースターでは珍しい「回転」や「上下反転」もあります。
「回転」は、コース内をグルグルと回るアトラクション。
# warn if there is any params on the meta device
offloaded_devices_str = " and ".join(
[device for device inset(device_map.values()) if device in ("cpu", "disk")]
)
iflen(offloaded_devices_str) > 0:
logger.warning(
f"Some parameters are on the meta device device because they were offloaded to the {offloaded_devices_str}."
)
ここからもう少し探る。2 つのブロックに分けてコードを見ていく。
変数 offloaded_devices_str に何を格納しているのか
offloaded_devices_str = " and ".join(
[device for device inset(device_map.values()) if device in ("cpu", "disk")]
)
1つ目は上記のブロック。まずは大枠から。リストに格納された何かしらの文字列を、" and " で結合して、offloaded_devices_str に格納している。
上記の例では、'gpt_neox.embed_in'~'gpt_neox.layers.30'までは 0 (GPU), 'gpt_neox.layers.31'以降は CPU に割り当てられている。そして、変数 offloaded_devices_str には cpu が格納される。
少し脱線するが、自分の環境の場合、GPU だけでは容量が足りず CPU が動員されている。この割り当ては device_map=auto を設定していることで Accelerate がいい感じに割り振っていると理解している。
ログの出力
次に、2つ目のブロックについて見ていく。
iflen(offloaded_devices_str) > 0:
logger.warning(
f"Some parameters are on the meta device device because they were offloaded to the {offloaded_devices_str}."
)
前述の通り、変数 offloaded_devices_str には cpu が格納されているため、if 文の条件に合致し、ログが出力される。ログは "Some parameters are on the meta device device because they were offloaded to the cpu." となる。また、ソースコード 2 の場合は offloaded_devices_str に cpu and disk が格納され、ログが出力されることがわかった。
You are using the default legacy behaviour of the <class 'transformers.models.t5.tokenization_t5.T5Tokenizer'>. This is expected, and simply means that the `legacy` (previous) behavior will be used so nothing changes for you. If you want to use the new behaviour, set `legacy=False`. This should only be set if you understand what it means, and thoroughly read the reason why this was added as explained in https://github.com/huggingface/transformers/pull/24565
Some parameters are on the meta device device because they were offloaded to the cpu.
西田幾多郎は、明治初期の物理学の第一人者であり、理神論者としても知られています。
彼は、万物は全て霊であり、その本質は、永遠に変わらないものと信じてやまなかったのです。 (以上「万物の霊の本質と、人心の科学」より)
「神がかり」が、なぜ、霊能者に、必要なのか、といえば、それこそ、神秘の世界に神を思うのが、真の宗教だからです。 霊の存在は、宗教そのものです。
宗教には、いろいろな
rinna_test.py の実行時間について
Out of Memory が発生したことから、自分の実行環境はサンプルコードの実行に耐えうるスペックではなさそうということが分かった。参考程度に実行時間について記載しておく。
測定には、time.perf_counter()を使用した。5 回実行したが、どれも 30 秒近くかかっていることが分かる。
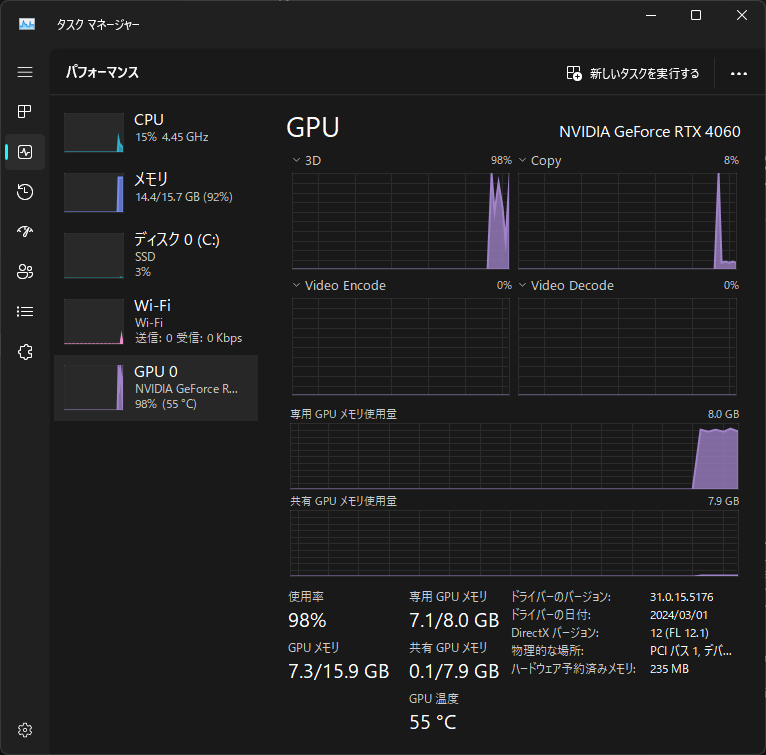
torch.OutOfMemoryError: CUDA out of memory. Tried to allocate 2.00 MiB. GPU 0 has a total capacity of 8.00 GiB of which 0 bytes is free. Of the allocated memory 14.45 GiB is allocated by PyTorch, and 116.28 MiB is reserved by PyTorch but unallocated. If reserved but unallocated memory is large try setting PYTORCH_CUDA_ALLOC_CONF=expandable_segments:True to avoid fragmentation. See documentation for Memory Management (https://pytorch.org/docs/stable/notes/cuda.html#environment-variables)